Trading a gas pump for a plug is a wonderful thing. It's far more convenient, takes less of your time, and saves you from breathing toxic fumes and smelling like gas for hours after fueling. Charging is a different experience than pumping gas and understanding the subtleties takes time. I've been driving electric for over two years and I'm still learning. Potential EV owners might want to get a head start on the learning curve, and maybe save a bunch of money as a result.
Mostly, I'll relate how charging works for a Nissan Leaf, a four-door, five-passenger hatchback with a range of about 100 miles, but I'll also mention other plug-in vehicles. The Leaf is intended for typical daily driving, which for 78% of drivers in the US means 40 miles or less per day. Occasional longer trips are possible and understanding charging will help you evaluate whether an EV will suit your driving needs.
Level 1 Charging
 |
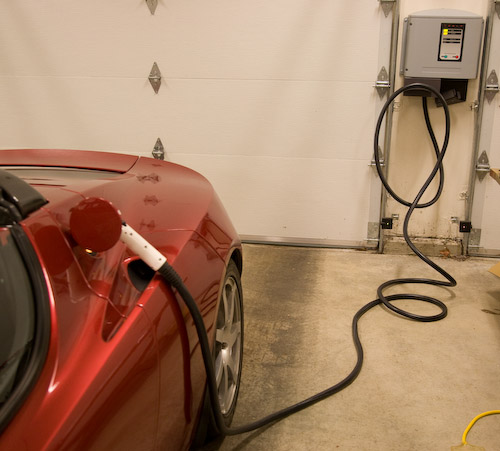
| Level 1 Charging - Standard House Outlet |
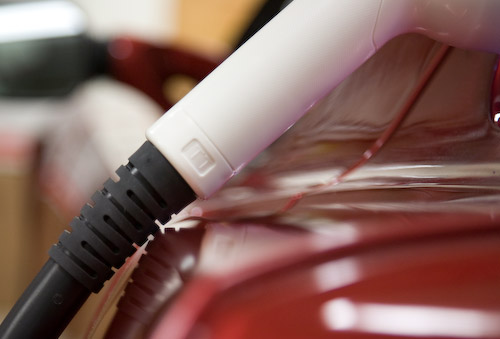
Level 1 charging is the technical jargon for plugging your car into an ordinary household outlet. For a Leaf, this means about 4.5 miles of range per hour of charging, or about 22 hours for a full charge. Wow, does that sound terrible! But there's a problem with thinking this way: you'll rarely need to do a full charge from flat empty to full. If you drive 40 miles per day and charge overnight, you'll be back to full in 9 hours. When you're sleeping, it doesn't matter if it takes one hour or 9 hours to charge.
But what if you have to drive a lot one day, say 80 miles? Sure, it would take 18 hours to get a full charge, but with a 9-hour overnight charge, you'll be ready for your normal commute the next day. If you drive less than 40 miles per day or charge for more than 9 hours, you'll work back up to a full charge over the next few days.
If you need to drive 80 miles on consecutive days, you'll need an alternative. Maybe you'll drive your other car, that gas-burner you keep around for long trips, or if there's public EV charging in your area, you can charge away from home while you're parked to do your shopping or other errands.
Level 1 charging at work could also be a supplement for people driving over 40 miles per day, or even a substitute for those who can't charge at home (because they don't have a garage or fixed parking place, for example).
Since it's easy to get 40 miles of range charging overnight from 120V, Level 1 is perfectly suited for overnight charging of the Chevy Volt, a plug-in hybrid with a 40-mile all-electric range.
Although Level 1 charging is generally too slow for a road trip, it can be helpful as destination charging. Cathy and I drove 90 miles to San Juan Island, charged for a few days in a friend's garage when not cruising around the island, and left with a full charge. That was great, but I wouldn't want to have to wait for Level 1 charging in the middle of a travel segment.
Beyond range issues, Level 1 may not be suitable for primary charging in all cases. In extreme climates, more power may be required to maintain proper battery temperatures. In these cases, Level 2 charging may be more appropriate (see below).
DC Fast Charging
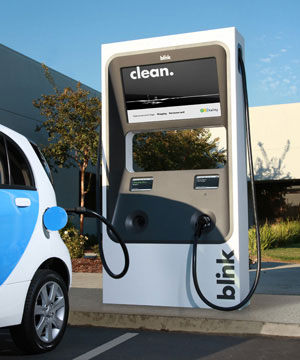 |
| Blink DC Fast Charge Station photo by ECOtality |
At the other end of the spectrum is DC Fast Charging, the fastest type of charging currently available. It provides up to 40 miles of range for every 10 minutes of charging. These stations are expensive (up to $100,000) and require more power than your house, so you'll never have one of these in your garage.
They are going to start appearing as public charging stations in the next year, beginning in the Leaf target areas. If there's one conveniently located near where you drive, you can get back up to 80% of a full charge while getting lunch or drinking a latte. Charging this fast makes it far more practical to drive beyond an EV's single-charge range in one day. It's still not going to make a one-day 800-mile drive practical, but a 200-mile drive with a couple of charging breaks can be quite doable.
Level 2 Charging
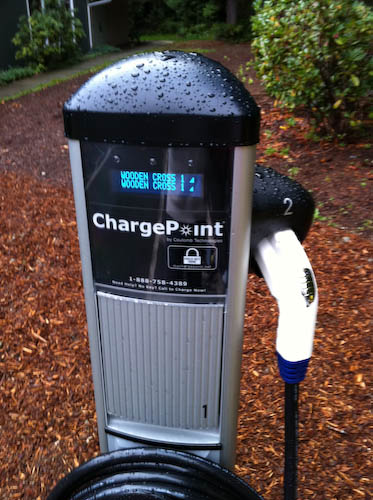 |
| ChargePoint/Coulomb Level 2 Charging Station |
Between the cheap Level 1 and expensive DC Fast Charging stations sits Level 2 charging. Level 2 supplies 240V, like what an electric dryer or oven uses. It goes through a box and a cord that improves safety by waiting to send power to the plug until it's plugged into an EV. Level 2 allows for a wide range of charging speeds, all the way up to 19.2 kilowatts (kW), or about 70 miles of range per hour of charging.
However, the charging stations being put in with federal grant money don't support the full range of Level 2 charging and max out at 6.6 kW or around 26 miles of range per hour of charging.
Both Level 1 and Level 2 charging stations simply deliver household electricity to the car. Electronics on board the car transform the wall power into the proper form to charge the battery. This bit of electronics built into the car also has a maximum power rating. The first model-year Leafs can only use 3.3 kW, about 12 miles of range per hour, or about 8 hours for a full charge from empty. The Chevy Volt's on-board charger is also limited to 3.3 kW, although its smaller battery pack gets full sooner.
Nissan recommends that you install a Level 2 charging station at home. That's a reasonable thing to do if you don't mind spending about $2,000, just consider it part of the cost of the car. Early buyers in the Leaf target markets may be able to get into The EV Project and get a free Level 2 charging station plus an allowance toward the install cost. Failing that, there's a 30% federal tax credit (up to $1,000) for installing EV charging, which can make it less expensive. Still, if you are planning to use your EV for a daily commute of 40 miles or less per day, you should at least consider using Level 1 charging at home. You can always add a Level 2 charging station later if you decide you need it.
There will soon be 20,000 public Level 2 charging stations (limited to 6.6 kW) installed mainly in the Leaf target areas. Even if you only have Level 1 charging in your garage, if you're in the early rollout areas, you should have access to convenient Level 2 charging available while your car is parked and you're doing something else. These charging stations will make it possible to drive 60 miles to a baseball game and pick up about 50 miles of range in 4 hours while you're having fun, thus easily driving over the single-charge range while always keeping a healthy reserve.
Charge Time and Battery Capacity
It's misleading that charging times are generally quoted as time for a full charge. While it does take about 22 hours (Level 1) or 8 hours (Level 2) to charge a Leaf from empty to full, you're not likely to do that often because you will rarely arrive home with a fully depleted battery. It doesn't matter if you're driving a 40-mile Volt, a 100-mile Leaf or a 240-mile Tesla Roadster, if your commute is 40 miles, you'll only need about 9 hours (Level 1) or 3 hours (3.3 kW Level 2) to charge.
When we bought our Tesla Roadster, we got the high-power 16.8 kW Level 2 charging station, which can charge the car in 3.5 hours. After driving the car for a few months, I realized it's all but pointless to have such a big charging station in our garage. It's rare that I drive over 40 miles in a day. The 16.8 kW charging station can restore 40 miles in under 40 minutes. I want that charging speed when I'm making a long trip, not when I'm sleeping at home. In fact, I manually drop the power I pull from the charging station to about 7.5 kW because it's a little nicer to our electrical panel and the grid, and my typical overnight charge is still under 2 hours. Ignoring the fact that Tesla is still using the now-incompatible proprietary charging plug they picked before there was a chosen standard, most people buying a Tesla Roadster today would be well-served to buy a 6.6 kW charging station for home.
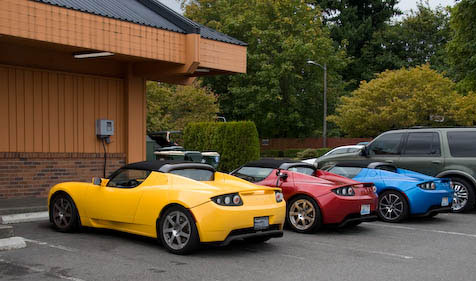 |
| 3 Roadsters Sharing the Charging Station at Burgerville |
Level 2 Charging, Road Trips, and Charging Speed
Already, Ford has announced that the upcoming electric Ford Focus will support charging at 6.6 kW, and is making fun of the Leaf's 3.3 kW Level 2 charging limit. By the time Ford actually starts delivering the electric Focus, Nissan may have already upgraded the Leaf to 6.6 kW charging. I don't think it will be long before mainstream EVs are capable of even faster charging. The Tesla Roadster can charge at 16.8 kW, which combined with a larger battery pack makes 400-mile drives possible even without DC Fast Charging. Given that Level 2 charging costs 1/10 of what a DC Fast Charger does, I can imagine a lot of driving being supported by full Level 2 charging stations in areas that can't justify the investment in DC Fast Charging.
Personally, I'm disappointed we're spending so much money installing these 6.6 kW public charging stations rather than full-speed Level 2 chargers when most of the expense is usually just running the wires and buying the fancy box. A typical commercial Level 2 install runs around $10,000 for a charging station that's connected to a network and capable of billing the user. Cranking those charging stations up to the 19.2 kW limit would add a small incremental cost, perhaps 10%, and would allow for much faster charging. If you're a business owner installing a charging station and have to dig a trench and/or run conduit, even if it's just a for 6.6 kW unit, I strongly recommend planning for running 100A wire later without having to retrench or replace conduit so that upgrading to a 19.2 kW charging station will be much less expensive.